

Today I'm going to teach you to make this.....

...from this! The easy way! Some of you may want to know why I would want to do that to start with. Well first, the cheapest way to cloth diaper is to use prefolds and covers. Prefolds only cost about $1-$2 each and if you have 24 you can wash every other day and have plenty of diapers. You only need about 4 covers (and that's PLENTY) to go with them and you are set. (Covers are the waterproof outer shell that keeps baby's clothes dry.) For the newborn stage cost is very important because they grow out of them so fast! Prefolds are bulky and fiddly to use on newborns, and that's why I haven't used mine at all until now. Fitteds however, make life much easier because you don't have to try to fold the diaper around your tiny baby. To be honest I just couldn't get the hang of it on a newborn. Prefolds come in several different sizes so as long as you have the correct size for your babe, this tutorial will work for you! The little contraption holding this diaper together is called a snappy and takes the place of the old fashioned pins. They are awesome, they make the diaper work without having the extra work of adding snaps or velcro, and you can get 2 for under $5. I also wanted to say that this tutorial will work with any rectangle shaped fabric. You could make diapers for free by just upcycling a few old t-shirts. Another thing that may be fun is dyeing your prefolds cute colors. I looked up a few other tutorials for this, but this way was just easier and had a lot less steps. I winged it on the first one, tried it out on my babe, loved it, and decided to share my way. Let's sew!

To start cut each edge of the prefold 3" down from the serged edge, stopping just before the center topstitching.

Like this.

Now zig zag each of those edges (be sure to back stitch on each end) so that they will look nice and neat and not unravel in the wash. To make the turn you can leave the needle down, raise the presser foot, and pivot or....

...just stretch it out straight like this.

Here is what you will have.

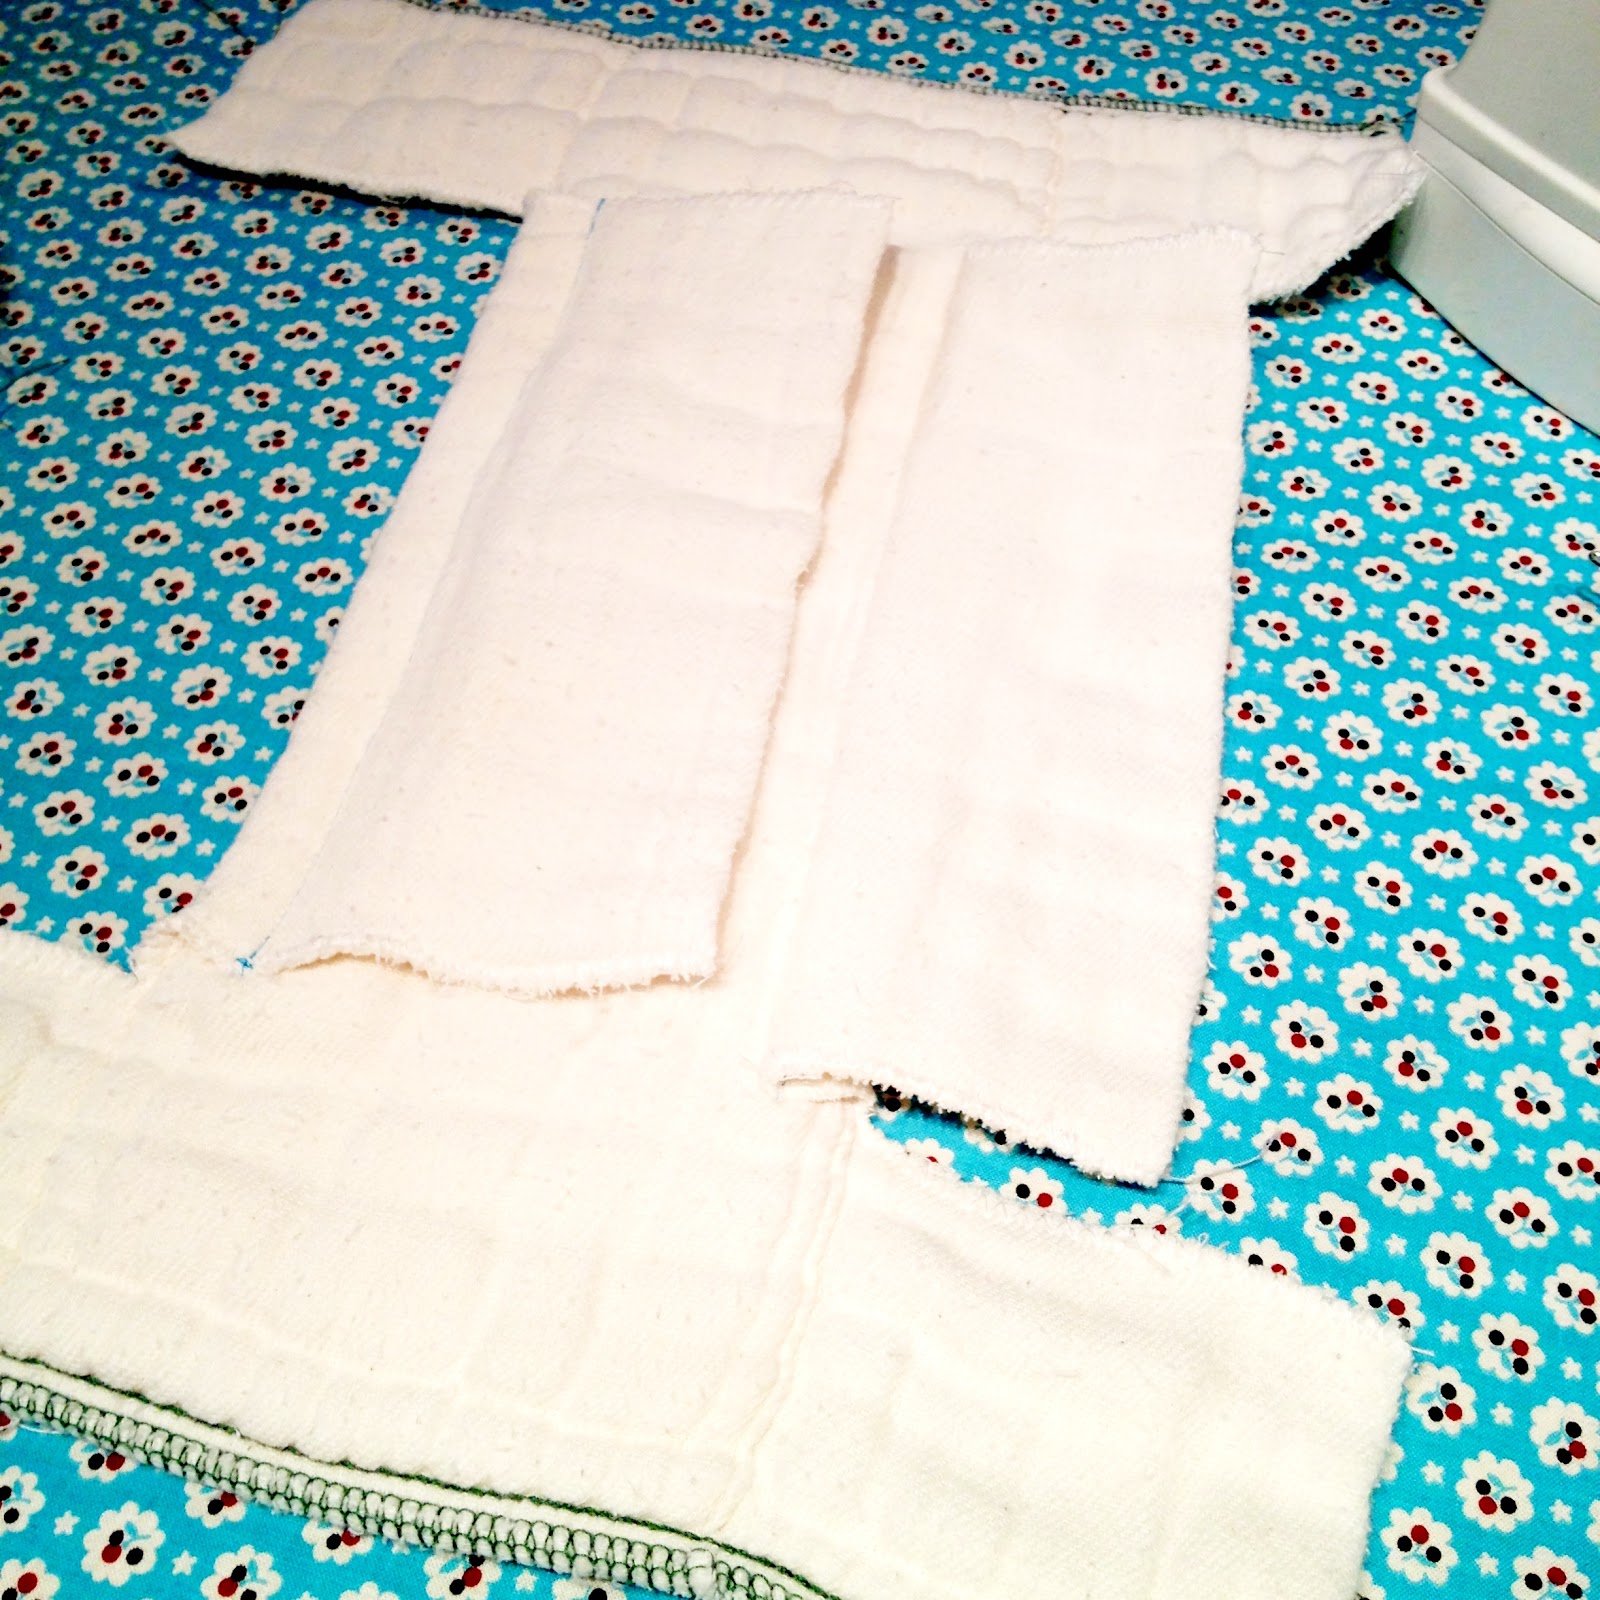
Now fold each center flap in and pin in place down the middle.

Topstitch 5/8" from the edge to make a casing for the elastic. Elastic is optional, it will still fit nicely under a cover without it, but not quiet as nice.

I stitched in darker thread so that you can see better. Do both sides this way.
You can fold these in and sew a line down the center to hold them flat, but I left them flappy because they will dry faster that way.

For the newborn cover you will need two 5" pieces of 1/4" elastic for each leg, for a small you need 5 1/2", and for all other sizes you need 6".
It's time to thread the elastic through the casings we made. I have this handy-dandy tube turner, but you could use a large safety pin if you don't have one.

Pull the elastic through until it's flush with the edge of the casing, pin...

...and stitch in place. I used a 3 step zig zag and backstitched a couple of times.

Now continue to pull the elastic through...

and pin the other end in place and stitch.

When you have done both sides this is what you will have!
Now slap a snappy on and add a cover and you are done!


And now with a cover, aren't those curled toes so sweet? I hope you guys find this useful! xo, Sam

PS. You may have noticed the Sweetbottoms icon on the side of my blog recently. I have made several orders from them while building my stash of cloth diapers and accessories and have been VERY happy. They have great prices, free shipping ALL THE TIME, wonderful customer service, and every order comes wrapped like a gift (which makes me soooo happy!). Also every time you order you get points which can be used like cash towards future orders. I have decided to become an affiliate, which means that if you click over to their website from my blog and make a purchase, I will get extra points to diaper my sweet babes. :) Or to splurge on a super cute new diaper or cover. :) If you decide to do that, thank you, and I just know you are going to love them! And YES they have prefolds and super cute covers!
Comments