(I now sell everything you need to do henna in my etsy shop HERE!)
Many of the pictures that you see here were done by my super awesome baby sister, Rae. Before kids she decorated cakes at a bakery, those skills transfer VERY well for applying henna!
Many of the pictures that you see here were done by my super awesome baby sister, Rae. Before kids she decorated cakes at a bakery, those skills transfer VERY well for applying henna!
(henna day 3, by Rae)
There are as many henna recipes as there are fish in the sea. Okay, so maybe not quite that many, but if you are just starting out it can be pretty confusing. It can be so complicated that it takes hours or days to make a batch with expensive ingredients, or it could be as easy as using a few things out of the pantry and spending a few minutes mixing and you are done. I use a VERY easy and no fuss recipe with all natural ingredients because it is safe for children. My kids love henna tats as much as I do so I always make it this way. At the end of this post I will include a list of links to all of the supplies that I use, you may want to check those out.
(henna dry paste, by Rae)
A few henna facts:
In my experience henna lasts about 2- 2 1/2 weeks, but a little less if I am really rough on my hands (like camping!) .
So far I have less than $30 invested in supplies and I have mixed countless batches of henna, it's very inexpensive and goes a long way.
It seems to last longer on certain skin types. For whatever reason my Maddie can wear henna for nearly a month, and the stain is more of a brown color on her, but it's more of a rust shade on me.
Henna tends to continue to get darker for the first 2-3 days. Whatever color it is on day 3 is usually the color it will stay.
You can freeze your leftovers and use them again. The thawed henna will have a more runny consistency than the original batch, but that's usually the only difference.
I usually do henna at night just before bed, let it dry, and then sleep in the paste. I find that the stain is much darker and more even that way because the paste stays on so much longer.
A lot of the recipes call for tea tree oil, you DO NOT have to use this oil to get a good mix. It stinks like gasoline, it isn't so nice to your skin, and it is not great for kids. Many people, including me, use lavender oil instead and it works great and has a very pleasant odor.
(henna wet paste, my sis's baby bump, by me)
(Henna wet paste, by me. Notice this paste turned out a little runny, you can see how the design is running together some. It's not ideal, but it's still useable.)
Mixing henna will take a little practice to get it just the way you like it, but it's not hard, and I've never ruined a batch! To give you an idea of how much it takes to do henna on the kids and I, I NEVER mix more than 4 TBS of powder and I always have leftover. If you need to see this to get a better idea of consistency just search You Tube, you can watch henna videos all day!
You will need:
An applicator bottle
Henna powder
Lemon juice (I use bottled lemon juice)
white sugar
lavender essential oil
My routine/ recipe:
Morning: In a plastic container, using a fork, mix henna powder into a paste using ONLY lemon juice, you are looking to get the consistency of toothpaste, transfer to a plastic zip bag, place in a warm place (on top of the fridge works fine). This stage usually needs at least 4-5 hours to sit.
1-2 hours before application: Transfer the henna back to the plastic container. Mix a little white sugar (enough to dust the top of the henna) and lavender oil into the henna mix,this time you want the consistency of hair gel, transfer to a plastic zip bag, place in a warm place on top of a white sheet of paper. The white sheet of paper will actually be somewhat discolored when the henna is ready, it will have a yellow tinge to it.
Evening/night: Get the party started! Apply henna! Let it dry. Sometimes I spray my dry henna with a mixture of lemon juice and water. The theory is that when it is moist it releases more stain. Try it if you like, it can't hurt! :)
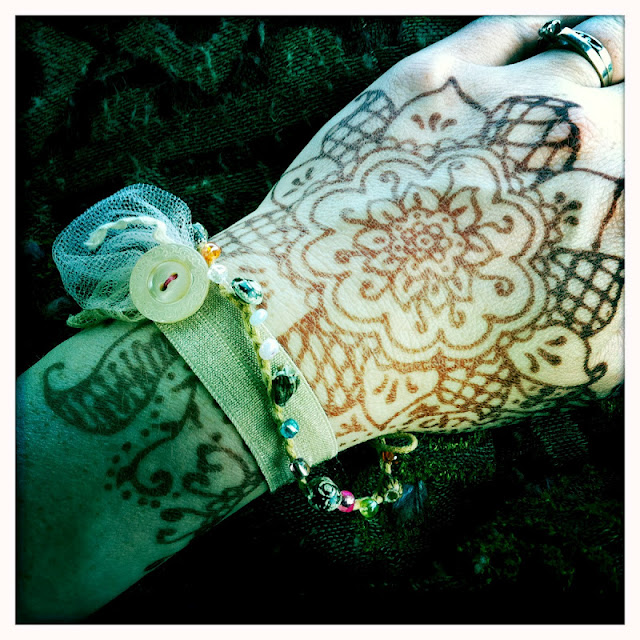
(henna day 2, by me)
(henna dry paste, by Rae)
(henna at 3 weeks, by me)
(henna dry paste, by Rae)
This is the henna I use (it's the second one down) HERE.This is the brand of lavender essential oil that I use (I buy mine at a local shop) HERE.
This is very similar to the applicator bottle that I use HERE.
You can get a good idea of application and how to design HERE.
(Henna day 2, by me)
(henna day 1/morning after, by me)


Comments
http://southasianpeoples.imb.org/resource/evangelism/henna/
Dawn