
My "Early Morning Skirt" Tutorial


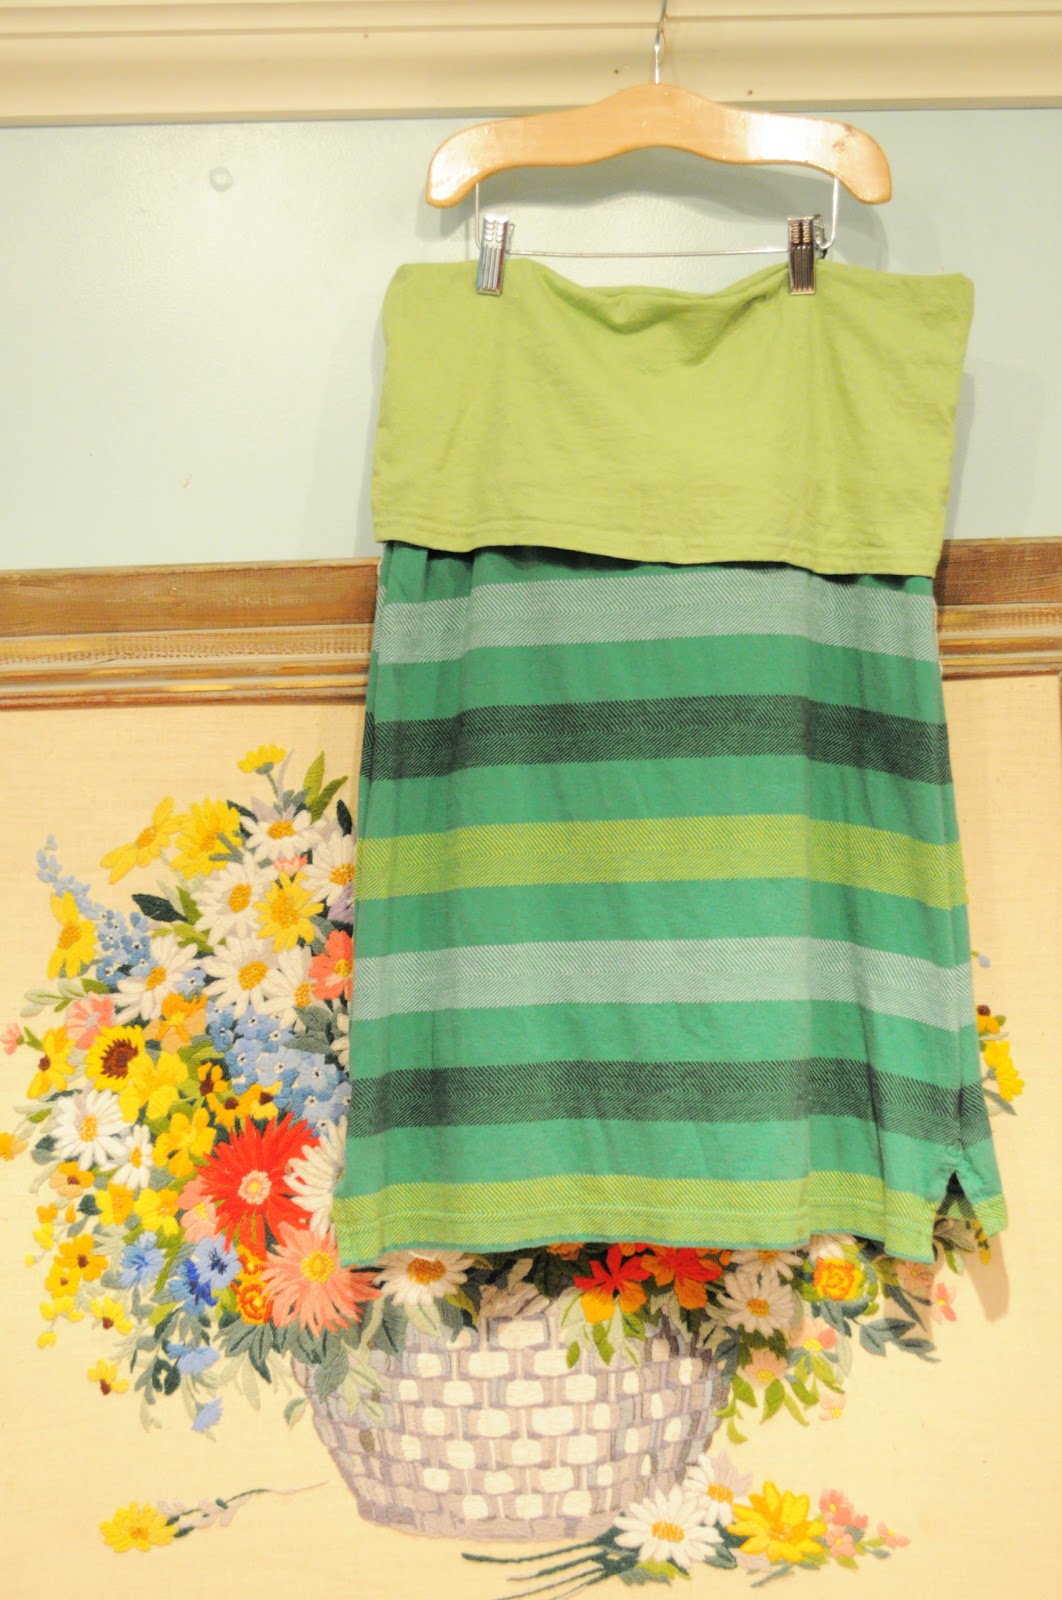
I am so excited about these! This A-line skirt (with a yoga style waistband) is made from two thrifted t-shirts. They are fast, easy, cheap, and flattering! It can't get much better than that! This little "recipe" will work for kids too. A few of you asked for a tutorial, and because they are so easy, I decided to whip one up. (By whip one up I mean that I made it up at night, when three of my kids were asleep and the lighting was terrible. Sorry about that.)


To start you need two coordinating old t-shirts (one of mine is a polo style shirt made out of jersey). The shirt that you will be using for the skirt part needs to be a couple of sizes bigger than what you would normally wear in a normal tee (so if a M fits you, you will need at least an XL for this). The shirt that you plan to use for the waistband can be your size or larger.


 Measure your waist where you will be wearing the waistband, and then take 3 1/2 inches off of that, now divide that in half (because you need a front and back). From the hem of your waistband-shirt measure up 13" and cut. Now using the measurement you have just figured for your waist, cut two panels that width (you will be cutting the width of the shirt, not the hem, the hem will be used as the finished edge of the yoga band). 
 

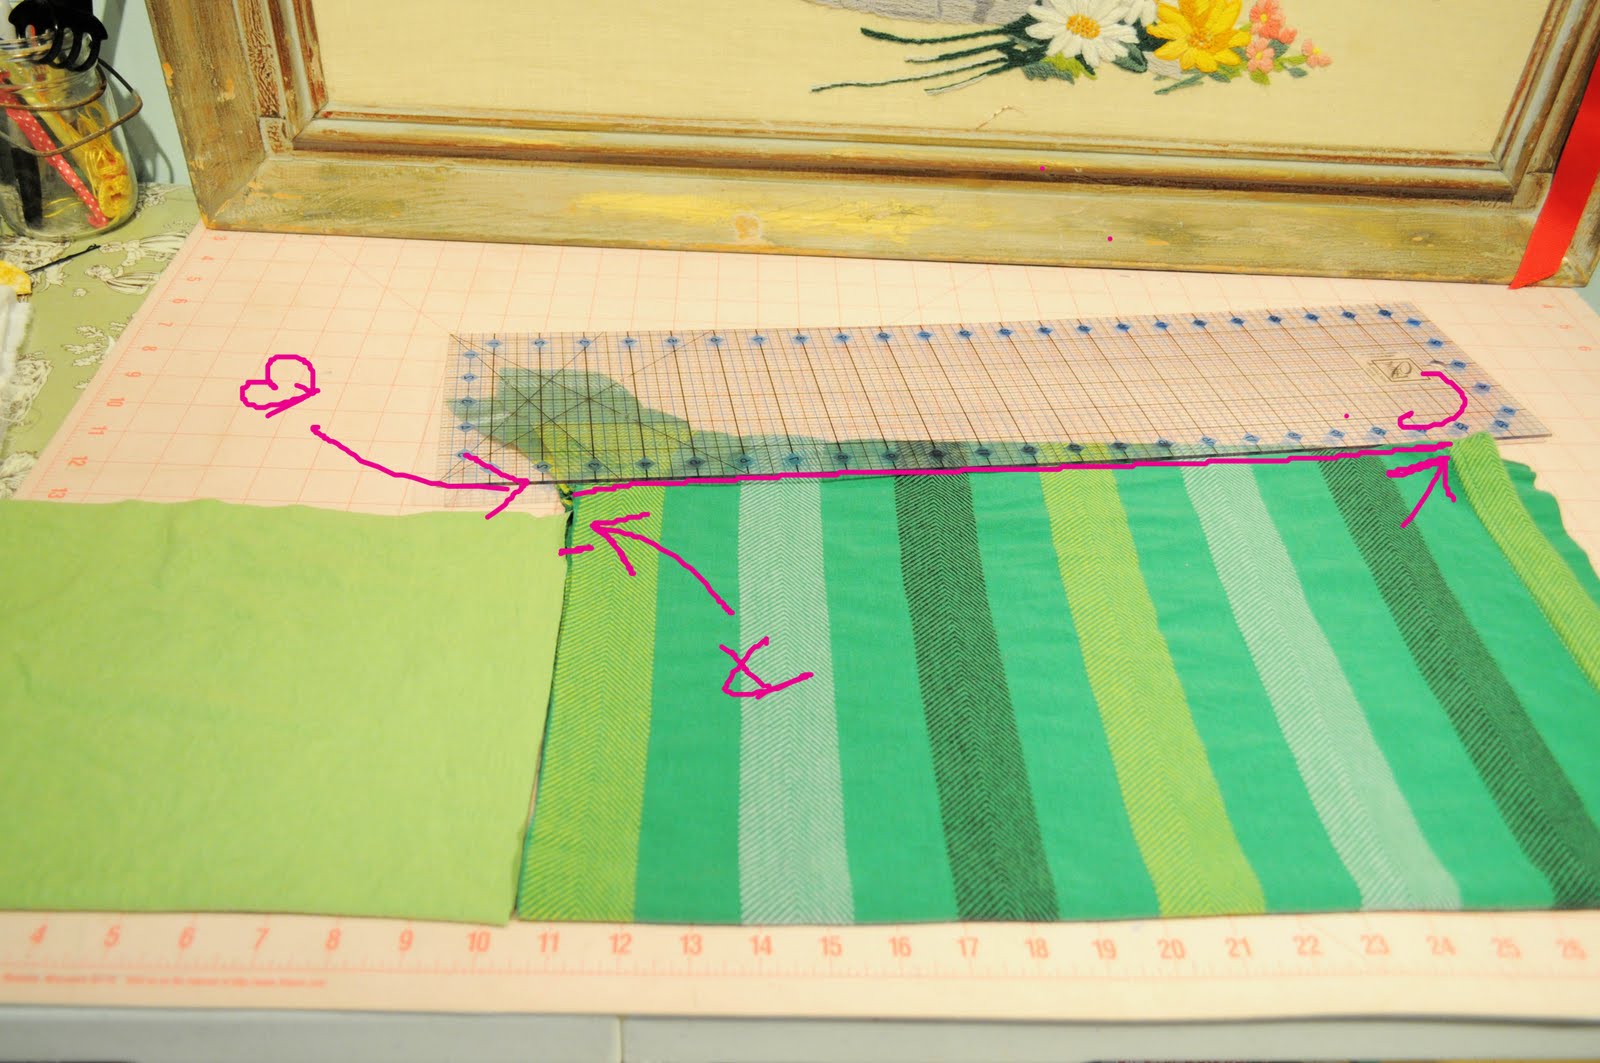
Measure from your waist to wherever you want your skirt to hit your leg, this is your length measurement. Using that measurement, measure from the hem of your skirt-shirt up and cut. Now fold the skirt and yoga waist in half long ways and lay together (as shown). Measure over 1" from where the waistband meets the skirt (A) and lay down your ruler (B), taper the ruler out to the end of your skirt (C) to create your A-line and cut.


Sew up the sides of your skirt and waistband with right sides facing.


Fit the skirt wrong side out inside of the waistband wrong side out (as shown).


Pin side seams to side seams, center front to center front, and center back to center back.


Sew or serge the waistband to the skirt stretching the waistband a bit to fit the skirt.


You now have yourself a super cool, quick and easy, summer skirt that you will never want to take off. There is a much better tutorial at Sew-Mama-Sew for a gathered style "Yoga Skirt" that you can make from knit fabric. I prefer the an A-line to a gathered waist because it is more flattering on me, but some of you may like this one better. :) If you have any questions just let me know and I will add the answers back to the post. Happy skirt sewing friends! xo, Sam

Comments

Melody said…
Thanks for posting this!

Do you think it would work as a maternity skirt, as long as I made the necessary adjustments for a big belly? It seems like it would, but I'm still a little hesitant to just try it......
Julia said…
What a great idea!
Anonymous said…
Woo hoo! Thanks!
Ginny Carter said…
Sam, I have been out of town to the National Bible Quiz Finals. This morning I got caught up on all your wonderful blogs. I love them all. They make me feel warm and fuzzy.
mandi said…
thank you for this tutorial! i am for sure making some of these this week!

Popular posts from this blog

The Handmade Dress Infomercial: Do you suffer from scrached DVD's?

Do your children cry when they can't watch their favorite movie because of irritating scratches? Are you sick of paying good money for movies that are scratched minutes after you take them from the case? Do you often wish that we could just go back to VHS because you could leave them out in the rain, bring them in and use them for a coaster, and then let the baby throw it for fun and it would STILL WORK!? ME TOO ! . We have struggled for years with scratched movies that were no longer watchable, but not anymore! We have finally found the secret formula to rid you of this nasty little problem forever! . Crest Kids Toothpaste! YES, that's what I said! Kids toothpaste! . A few months back I heard some place that toothpaste would take of scratches and I tried it and it didn't work, then the other day out of pure desperation I tried it my way. IT WORKED! So I decided this kind of news could not be kept secret, I have to tell the world! So I

New triple bunks.

Ben designed new bunk beds for the "girl's dorm" and "boy's dorm" in our house. We LOVE them!! We are almost done with all of the work, just a few loose ends left to tie up, but I couldn't wait to show off his handy-work. This is the girl set. We stained them with colored stain and we really like how that turned out. It's almost the color of cranberries. I still need to paint the boards that are attached to the wall. I'm going to paint them the color of the wall so that it looks like the beds are floating. :)  This is the boy set while still under construction. We ordered new bunk mattresses, but they haven't come in yet. I will show you guys pictures when they are completely finished. We stained these green, it looks like the color of bamboo. The kids LOVE these beds! And oh the space we have now! I'll be back soon with finished pictures! xo, Sam If any of you make beds using these plans could you send us a picture? We

A Wee Newborn Fairy Bonnet Pattern

I wanted to make something to go with the cardigan I made for my coming niece, so I decided on a wee fairy bonnet. I didn't find a pattern online and what I had in mind was simple enough, so I knit this one up and jotted down the pattern to share. ( matching cardigan ) So here is what you will need to get started.... Worsted weight yarn Size 9 knitting needles Size H crochet hook Finished measurements before seaming is 12" x 5 1/2". Cast on 52 sts Row 1-4: k every st Row 5: k4, P to last 4 sts, k4 Row 6: k3, yo, k2tog, k to last 5 sts, k2tog, yo, k3 (This will make a little buttonhole for the strap to thread through later, see picture above.) Row 7: k4, p to last 4 sts, k4 Row 8: k every st Repeat until piece measures 5 1/2", BO leaving a 12" thread tail. Fold piece in half, with right sides facing, and seam up the back using the thread tail. Making the Ties: You will follow th